Installing a garage door opener is a task many homeowners consider taking on themselves. Whether you want to save on professional installation costs or enjoy the satisfaction of completing a DIY project, installing a garage door opener can be a fulfilling experience. However, it’s important to approach the job with the right knowledge and tools. In this beginner’s guide, we’ll walk you through the step-by-step installation process, ensuring that you can confidently complete the job yourself. Additionally, we’ll cover the best practices, safety features, troubleshooting, and tips to guarantee a smooth and successful setup.
Understanding the Basics of a Garage Door Opener
Before diving into the installation, it's essential to understand the different types of garage door openers available on the market. The most common types include:
- Belt Drive Garage Door Opener: Known for its quiet operation, this opener uses a rubber belt to move the door.
- Chain Drive Garage Door Opener: This type uses a metal chain to open and close the garage door. It is often more affordable but louder than belt drives.
- Screw Drive Garage Door Opener: Using a threaded steel rod, this opener is known for its durability and requires minimal maintenance.
- Smart Garage Door Opener: These modern openers allow you to control your garage door from anywhere using a smartphone app.
When selecting your garage door opener, it's important to choose the model that best suits your needs. This will ensure a smoother installation process and better long-term performance.
Tools You’ll Need for Garage Door Opener Installation
Here’s a list of the essential tools you'll need for a successful installation:
- Screwdrivers (flathead and Phillips)
- Power drill with bits
- Wrenches
- Pliers
- Tape measure
- Ladder
- Level
- Wire cutters and strippers (for wiring)
- Safety goggles and gloves
Having the right tools on hand will ensure you can complete the installation without unnecessary frustration.
Step-by-Step Garage Door Opener Installation
Follow these instructions to set up your new garage door opener:
1. Prepare Your Garage Door
Before beginning the installation, ensure your garage door is in good condition. Inspect the springs, cables, and rollers. If any of these parts are damaged, you may need to address these issues before proceeding with the opener installation.
2. Install the Mounting Bracket
The first step in the physical installation process is to mount the bracket that will hold the opener’s motor. Attach the bracket to the ceiling of your garage using the hardware provided. Use a level to make sure it’s positioned correctly, and securely fasten the hardware.
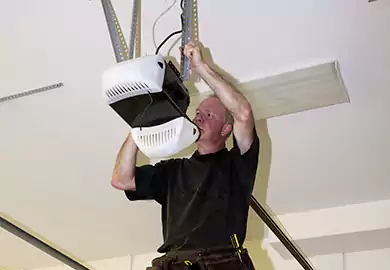
3. Install the Garage Door Opener Motor
Once the bracket is in place, it’s time to install the motor unit. Carefully lift the motor into position, using a ladder for support, and attach it to the mounting bracket. Make sure the motor is firmly secured.
4. Install the Drive Mechanism
Next, attach the drive mechanism (belt, chain, or screw) to the motor. This is crucial for the operation of the garage door. Follow the manufacturer’s instructions carefully to ensure the drive is installed correctly. You'll also need to install the rail that connects the motor to the door itself.
5. Connect the Garage Door Opener Wiring
Once the motor and drive are installed, it’s time to wire the opener. Connect the opener’s wires to the power source, following the manufacturer’s guidelines. Be sure to take all necessary precautions when handling electrical components to ensure safety.
6. Install the Safety Sensors
Most modern garage door opener installation include safety sensors that detect obstacles in the door’s path. These sensors should be installed at the base of the door, one on each side. Make sure they are aligned correctly for optimal functionality.
7. Program the Remote and Keypad
After installing the motor and safety sensors, program the remote controls and keypad. Follow the instructions provided by the manufacturer to sync these devices with your opener. Test the remote and keypad to ensure they work as expected.
8. Test the System
Before you finish, test the garage door opener. Ensure the door opens and closes smoothly, without any unusual noise or movement. Also, check the door’s balance. If the door is unbalanced, the opener may not function properly.
Garage Door Opener Features to Consider
When choosing the best garage door opener for your home, consider these important features:
- Wi-Fi Connectivity: This allows you to control your garage door from anywhere using a mobile app.
- Battery Backup: Ensures your opener continues to work during power outages.
- Safety Sensors: These are crucial for preventing the door from closing on people or objects.
- Security Features: Look for openers with rolling code technology to prevent unauthorized access.
These features can significantly enhance the convenience, safety, and security of your garage door opener.
Garage Door Opener Troubleshooting
Even after installation, you may encounter issues. Here are some common troubleshooting tips:
- Check the Safety Sensors: Make sure the sensors are properly aligned and not obstructed.
- Inspect the Drive Mechanism: If the chain or belt is too loose or too tight, adjust it according to the manufacturer’s instructions.
- Examine the Remote: Ensure the remote's batteries are working, and check that the opener is receiving the signal properly.
Professional Garage Door Opener Installation vs. DIY
While a professional installation ensures precision and expertise, it may come at a higher cost. A DIY installation can save you money and offer the satisfaction of completing a project yourself. However, if you’re unfamiliar with electrical work or mechanical systems, hiring a professional could be the safer choice.
Additional Tips for Easy Garage Door Opener Installation
To make your installation smoother, consider the following tips:
- Use a Helper: Having someone assist you can make lifting and positioning the motor much easier.
- Check the Alignment: Double-check the alignment of the door and opener to prevent any operational issues down the road.
- Follow the Manual: Always refer to the manufacturer’s instructions for specific guidance on your garage door opener setup.
- Stay Safe: Never skip over safety features. They are there to protect you and your family.
Conclusion
Whether you choose to install your garage door opener yourself or hire a professional, understanding the process is key to ensuring a smooth, safe, and efficient installation. By following this guide, you’ll be well-equipped to install your opener with confidence. With proper installation, safety features in place, and occasional troubleshooting, your garage door opener will serve you reliably for years to come.